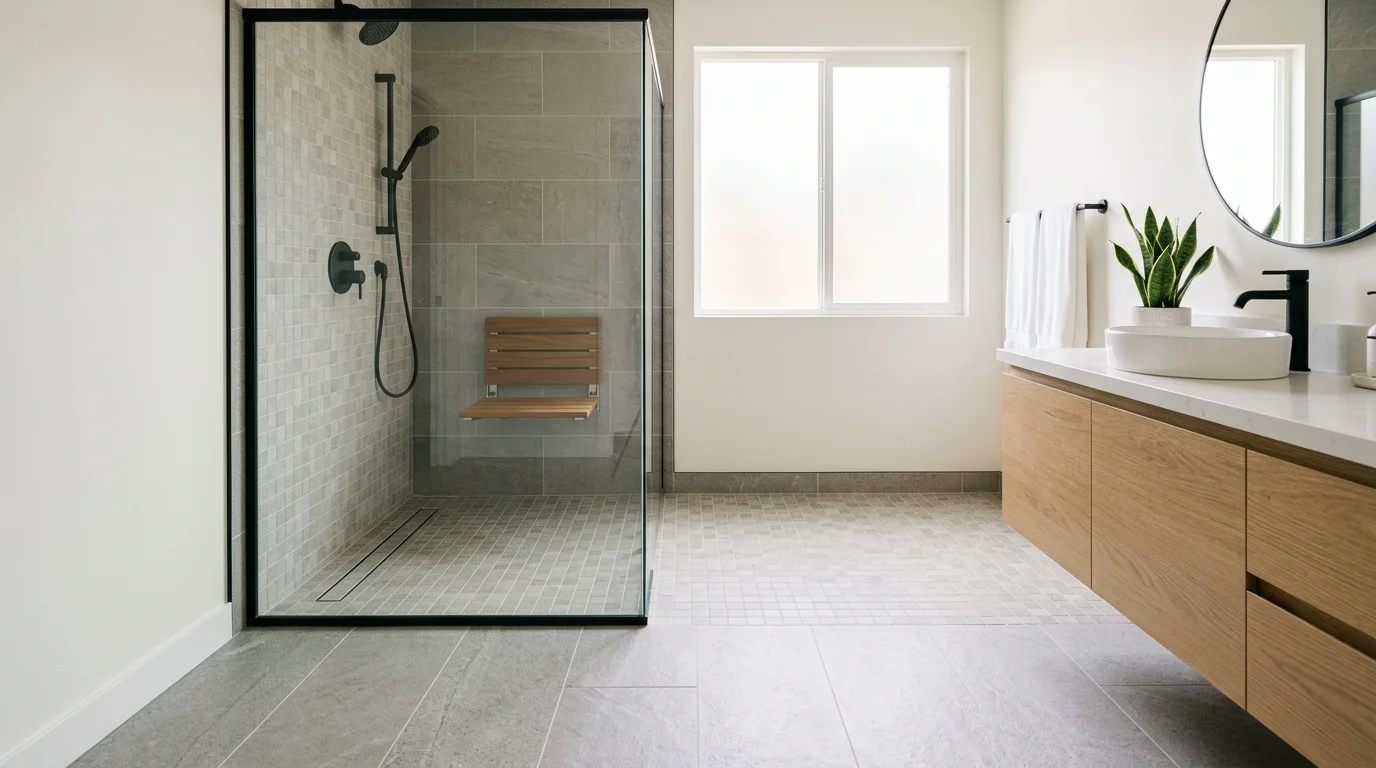
For roll-in showers in San Diego, the missing curb is only the visible change. The real decision is how the floor will drop, drain, and meet the bathroom without leaving a raised edge. That answer starts below the tile, before anyone chooses grout or glass.
What curbless means below the tile
A conventional shower begins above the bathroom floor. Its curb separates the wet area from the rest of the room. A curbless shower removes that step, so the shower floor and bathroom floor meet at one entry.
Removing the curb doesn’t remove the need to direct water. It changes where that work happens. The remodeler has to coordinate the floor elevation, drain location, tile layout, and water-managed assembly as one system.
The finished entry can look almost flat. Inside the shower, however, the surface still moves downward toward the drain. That change may be subtle underfoot, but it has to be planned across the available distance. The drain can’t be treated as an isolated fixture placed after the floor is built.
Tile thickness also matters to the final elevation. Tile, setting material, and the shower assembly occupy physical depth. The bathroom flooring outside the shower has its own thickness. Those layers need to meet without creating an unintended lip.
That’s why a curbless shower isn’t just a standard shower with its curb deleted. The work begins with measured floor heights and the structure below them. A licensed remodeler can then develop the entry around the actual room.
The same planning applies whether the goal is wheelchair access, easier walking, or a cleaner visual line. A shower remodel and walk-in shower project should address the floor transition before finishes are ordered. Otherwise, a tile choice or drain position may conflict with the depth available below.
Recessing the framing or building the floor up
There are two basic ways to create room for the shower floor. The shower area can move down, or the surrounding bathroom floor can move up. Some projects combine both approaches.
Moving the shower area down means creating a recess within the existing floor assembly. What that involves depends on what lies beneath the bathroom. A wood-framed floor and a slab-on-grade foundation present different conditions. Neither should be altered from a finish drawing alone.
With framing, the remodeler needs to identify joist locations, direction, spacing, and existing openings. Plumbing routes matter too. A drain shown at the center of a sketch may land over framing or another obstruction once the floor is opened.
A slab calls for a different evaluation. The pro needs to understand the existing floor, drain route, and available depth before choosing an approach. The finished photo won’t show those constraints, but they can control the entire layout.
The other option is raising the bathroom floor around the shower. This can preserve more depth below, but it moves the transition elsewhere. The new elevation may affect the bathroom doorway, vanity, toilet area, and adjoining hall or bedroom.
That tradeoff is especially important when the goal is an easy path into the shower. Solving the shower entry by creating a new obstacle at the bathroom door misses the larger purpose.
Measure the whole route, not only the shower opening. Start outside the bathroom and follow the intended path to the shower. Compare that route with the walk-in shower dimensions guide before settling on a footprint. A good plan accounts for every floor transition the user will cross.
Linear drains and where the slope goes
The drain location determines how the shower floor changes elevation. It also affects tile cuts, entry placement, and where water travels.
A point drain draws the floor toward one location. That creates multiple sloping planes around it. Smaller tile can follow those planes more easily because the grout joints allow frequent changes in direction.
A linear drain collects water along a longer edge. It can support a floor that slopes mainly in one direction. That may work well with larger-format tile, depending on the room and drain placement. It doesn’t eliminate slope or floor-depth planning.
A linear drain can sit near a wall, at the entry, or elsewhere in the shower design. Each position changes the floor geometry. An entry drain also becomes part of the transition between wet and dry areas. A wall-side drain sends the shower surface downward across the enclosure.
The best position comes from the actual room. The remodeler should compare the drain route, available floor depth, shower controls, glass, and expected path through the space. Choosing a drain from appearance alone can force awkward tile cuts or a difficult floor transition.
The surrounding bathroom floor deserves attention too. A roll-in entry opens the shower to the room, so the plan should consider water that travels beyond the main spray area. Glass placement and the shower opening influence that boundary, but they don’t replace the floor plan.
Ask the matched pro to show the intended high and low points before tile work begins. The drawing should make the direction of the floor understandable. You shouldn’t have to infer it from a fixture schedule or a product photo.
The clear dimensions accessible work is built to
“Curbless” describes the lack of a raised entry. “Roll-in” also points toward an accessible layout with enough clear space for entry and movement. Those goals overlap, but the words aren’t interchangeable.
The federal ADA Standards provide useful accessibility benchmarks. They govern places of public accommodation and commercial facilities. They don’t govern a private single-family home. Homeowners can still use the published dimensions as design references when planning accessible work.
The U.S. Access Board’s ADA Standards identify two roll-in shower configurations:
- A standard roll-in shower is at least 30 inches wide and 60 inches deep inside. Its minimum entry width is 60 inches.
- An alternate roll-in shower is at least 36 inches wide and 60 inches deep inside. Its minimum entry width is 36 inches.
The Standards also describe a transfer shower. That compartment has 36-by-36-inch clear inside dimensions and a minimum 36-inch-wide entry. It serves a different transfer approach than a roll-in configuration.
For public facilities, shower compartment seats are set 17 to 19 inches above the bathroom finish floor. Grab bars are set 33 to 36 inches above the finish floor, measured to the top of the gripping surface. Circular grab bars have an outside diameter from 1 1/4 to 2 inches.
Those figures are accessibility benchmarks, not a claim about what the law requires inside your San Diego home. A residential design should respond to the intended user, mobility device, entry path, and room dimensions.
A walk-in tub and accessibility bath may also deserve comparison when stepping, standing, or transferring is difficult. The right choice depends on how the person enters, bathes, and leaves the space.
Whether your floor structure allows it
A concept drawing can establish the goal. The existing floor decides how directly that goal can be built.
The assessment starts with the current bathroom elevation. The remodeler needs to compare the shower area, bathroom floor, doorway, and adjoining room. The structure and drain route below those surfaces shape the available options.
Don’t assume a larger bathroom makes the floor work simple. Open floor area doesn’t reveal joists, slab conditions, plumbing routes, or elevation changes. A compact room may have a workable path, while a larger room may require a different drain location or raised floor.
The proposed tile should enter the discussion after those conditions are understood. Large pieces and small mosaics behave differently across changing floor planes. The layout also affects cut edges at drains, walls, and the shower entry.
San Diego permit jurisdiction depends on the property address. Bathroom remodels within the City of San Diego go through Development Services, and whether a particular project needs a permit depends on its scope. Specific triggers and fees weren’t confirmed for this page, so check the current requirements with the department before work begins.
For an unincorporated community such as Ramona, Fallbrook, Alpine, or Valley Center, building permits go through County Planning & Development Services. Incorporated cities such as Chula Vista, El Cajon, Encinitas, and Oceanside operate their own building departments. Confirm the jurisdiction tied to the property rather than relying on the mailing city.
Before hiring, verify the remodeler through the CSLB license check. Bath Pro SD connects homeowners with licensed independent local pros. The matched remodeler performs the physical work and handles project-specific planning.
When to call us
Call when a curbless entry requires changes to framing, concrete, drainage, or the surrounding bathroom floor. That work needs a licensed bathroom remodeling pro who can inspect the existing structure and plan the complete transition. Call us at (858) 400-4896 and we’ll connect you with a licensed local bathroom remodeler.