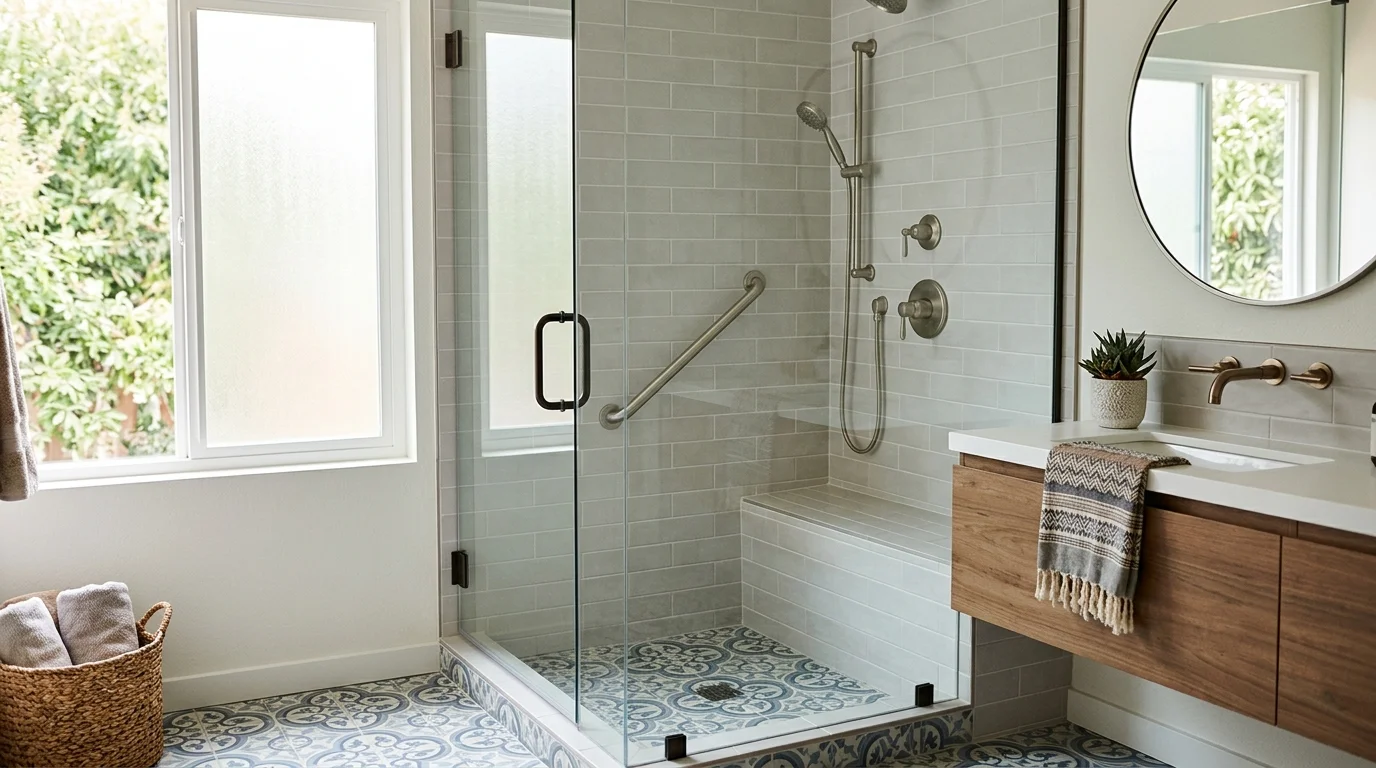
If you searched for a bathroom bar handle in San Diego, the fixture you mean is usually called a grab bar. Its location should be planned before tile installation, while the wall framing remains visible. That gives the remodeler room to place structural backing around the person who’ll use it.
Why a grab bar is a framing decision
A grab bar looks like a finish item. Most of the important work sits behind it.
The remodeler must first understand where the user will stand, turn, sit, and transfer. The wall can then be opened and prepared for those grip points. Once the tile covers everything, moving a planned mounting point becomes harder.
This decision belongs early in a shower remodel. Discuss it before finalizing the tile pattern, plumbing trim, niche, door, and controls. Those items compete for limited wall space. A beautiful tile layout won’t help if its best mounting locations don’t match the user’s reach.
Mock up the proposed positions before closing the wall. The intended user should walk through each movement at full scale. Mark comfortable grip locations with painter’s tape. Include a caregiver when assistance is part of the plan. A bar placed from a drawing alone may miss how someone actually enters the room.
San Diego permitting also depends on the project’s scope. Within the City of San Diego, bathroom permits are handled through Development Services. Chula Vista and other incorporated cities run their own building departments. An unincorporated Spring Valley property goes through County Planning & Development Services.
A universal permit-trigger list or fee couldn’t be confirmed from the approved city and county material. Before work begins, ask the correct department whether the planned scope needs a permit. Don’t rely on a rule copied from another San Diego County jurisdiction.
Blocking, studs and what drywall anchors can’t do
Blocking is structural backing placed between or alongside wall framing. It gives the installer a planned mounting area behind the finished surface. Its exact material and attachment method should match the wall assembly and grab bar instructions.
A stud may already sit behind one mounting point. That doesn’t mean the other end will land where the user needs it. Moving the bar just to catch framing can produce an awkward grip. Adding backing while the wall is open lets placement follow the user instead.
Drywall anchors solve a different problem. They attach hardware to a finished panel when framing isn’t available at that spot. Don’t treat a generic anchor as interchangeable with planned structural backing. The installer should identify the complete mounting assembly, the wall materials, and the bar manufacturer’s instructions.
Ask the remodeler to document the backing before it disappears. A wide photo of each wall is helpful. Closer photos can show the backing’s position relative to fixed features. Keep those images with the remodel records. They’ll help if a bar is installed later or another fixture needs service.
The tile layout matters too. A mounting plate may cross a grout joint, trim edge, or decorative strip if nobody coordinates the two plans. Review the bar, tile, and fixture elevations together before the wall closes.
For larger remodeling work, confirm the contractor’s status through the official CSLB license check. Bath Pro SD matches homeowners with licensed, independent local bathroom remodelers. The matched pro performs the physical work and determines the appropriate mounting system.
The heights and diameters accessible work is built to
The federal ADA Standards govern places of public accommodation and commercial facilities. They don’t impose residential grab bar dimensions on a private single-family home. Still, their measurements provide a clear benchmark for accessible design.
For public facilities, the U.S. Access Board’s ADA Standards set the top of a grab bar’s gripping surface between 33 and 36 inches above the finished floor. That 33-to-36-inch range is a public-facility standard, not a legal requirement for a private San Diego home.
The same public-facility standards set a circular grab bar’s outside diameter between 1 1/4 and 2 inches. Again, that diameter range is an accessibility benchmark. It isn’t presented here as residential code.
These measurements explain why a grab bar can’t be selected only by appearance. The user’s hand, reach, balance, and movement still matter in a home. So do the bar’s shape, wall clearance, finish, and mounting instructions. A homeowner may also need a position tailored to a wheelchair, walker, joint limitation, or caregiver-assisted transfer.
Our guide to ADA bathroom requirements explains other public-facility benchmarks and their residential limits. Keep that distinction clear when planning. “ADA-style” isn’t a substitute for measuring the actual user and room.
Mark the proposed height on every relevant wall. Then test it from the user’s real positions, not just while standing in an empty room. Include the future shower floor, tub edge, seat, toilet, and finished flooring in the mockup. Measurements taken from unfinished framing can become misleading after those surfaces are installed.
Placement at the toilet, tub and shower
There isn’t one residential layout that fits every person or bathroom. Placement should follow a sequence of movements.
At the toilet, study the approach first. Note where the user turns, lowers, sits, and rises. A person transferring from a mobility device may use the space differently from someone who needs support only while standing. The bar must also remain reachable from the position where it’s needed.
Check nearby fixtures before approving the location. The vanity, toilet paper holder, window trim, and door swing can interfere with the hand path or mounting plate. A small City Heights bathroom may require more coordination than an open floor plan, but the user’s movement still drives the decision.
At a tub, entering and lowering are separate actions. Walk through both. A grip used while stepping across the tub edge may not help once the person is seated. If a walk-in tub or accessibility bath is planned, coordinate bars with its door, seat, controls, and manufacturer instructions.
In a shower, review the entry, washing position, controls, and any seat. Test the layout with the door in its open and closed positions. Don’t let a towel bar stand in for a planned grab bar. They’re different products with different mounting instructions.
The intended user should participate whenever possible. Place temporary tape at each proposed grip point and rehearse the movement slowly. Look for twisting, overreaching, or a hand changing positions mid-transfer. Adjust the marks before the installer adds backing.
Future needs deserve attention, too. A homeowner may want backing installed for another bar without adding that bar today. Photograph and measure those concealed locations. Later installation will still require a pro to confirm the wall conditions and selected mounting system.
Adding bars to a bathroom that’s already tiled
Finished tile doesn’t automatically rule out a grab bar. It does change the investigation.
Start by identifying what’s behind the tile. The installer may review construction records, inspect from an accessible adjoining wall, or use appropriate locating methods. The goal is to understand the substrate and framing before choosing a mounting system.
Several paths may be considered. A bar might align with confirmed framing. The remodeler might access the wall from the opposite side and add backing. Another plan may involve removing a limited tile area, preparing the wall, and rebuilding the finish. A manufacturer-listed mounting system may also be evaluated for the specific wall assembly.
No option should be chosen from the tile surface alone. Tile type, substrate, framing, waterproofed areas, plumbing, and electrical components can affect the work. Product instructions matter as much as the bar’s appearance.
Matching existing tile can also shape the decision. If spare pieces remain from the original installation, locate them before opening the wall. When no matching tile is available, the remodeler can discuss an intentional accent area or a broader surface update. Don’t assume an exact visual match is available.
Ask for a written explanation of the proposed attachment method. It should identify the bar, mounting hardware, wall conditions, and manufacturer guidance. If the installer can’t explain what will support the bar, pause before drilling.
This is also a good moment to review the whole bathing area. A bar addition may connect naturally with a door change, seat, control relocation, or larger accessibility plan. Keep the project focused on the user’s movements, not on filling every open wall.
When to call us
Call when grab bar work involves hidden framing, finished tile, a shower rebuild, or a larger accessibility update. A licensed bathroom remodeler can inspect the room and plan the mounting approach. Call us at (858) 400-4896 and we’ll connect you with a licensed local bathroom remodeler.